There’s nothing more frustrating than finding unsightly flakes of your sofa stuck to your clothes or scattered across the floor.
You might think your furniture is a total loss, but here’s the truth: most peeling leather isn\’t actually genuine hide—it’s usually bonded leather or faux leather where the synthetic coating has failed.
The good news? You don’t need to spend thousands on a new sofa or professional reupholstery.
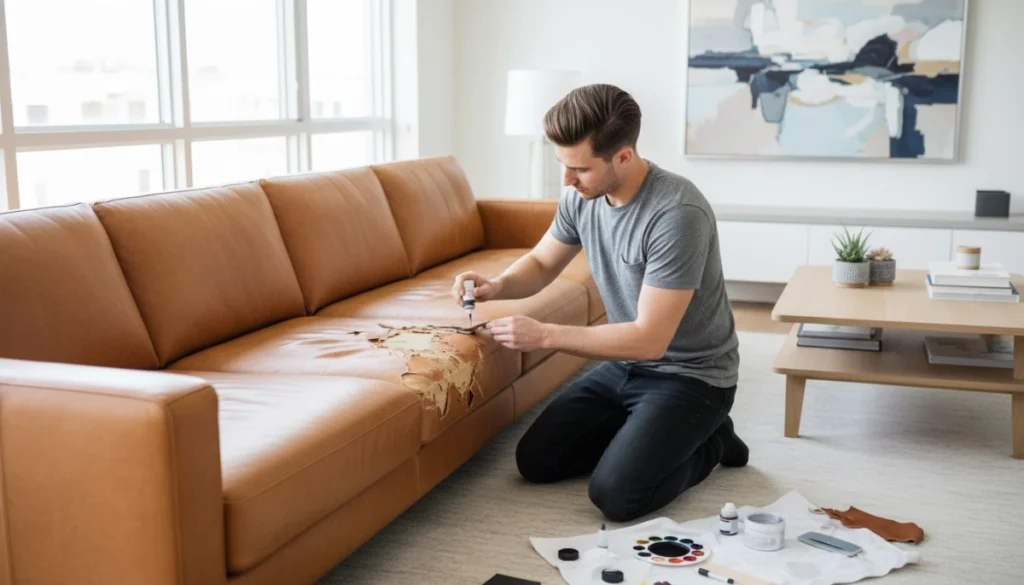
In this guide, I’m going to show you exactly how to repair a peeling leather couch using proven DIY leather couch repair techniques. Whether you need a quick fix with a self-adhesive leather patch or a seamless restoration using leather filler and color matching, I’ve got you covered with steps that are easy, affordable, and built to last.
Let’s dive right in.
Identify Your Couch Material
Before I dive into how to repair a peeling leather couch, I always start by checking exactly what the piece is made of. The \”peeling\” you see is usually the biggest giveaway. Real leather rarely peels in thin, plastic-like sheets; instead, it tends to crack or scratch. If your sofa is shedding small, flaky layers, you’re likely dealing with bonded leather or faux leather (PU/Vinyl).
Real Leather vs. Bonded and Faux
Knowing the difference is vital because your repair method depends entirely on the base material.
- Genuine Leather: This is a natural hide. It has a distinct, earthy smell and a porous surface that absorbs oils. It usually develops a patina rather than peeling.
- Bonded Leather: This is actually a mix of shredded leather scraps glued to a fabric backing and topped with a polyurethane (PU) coating. When that glue fails, the top layer peels off in flakes.
- Faux/Synthetic Leather: Completely man-made. It looks uniform and often has a mesh or fabric underside visible once the surface begins to \”shed.\”
Why Material Determines Your Repair Method
I’ve found that while genuine leather can often be sanded and restored with professional binders, peeling faux leather couch repair usually requires flexible fillers or adhesive patches. Because bonded leather lacks a solid structure, it won\’t \”heal\” like real hide. Identifying this early saves you from buying expensive kits that might not bond to a synthetic surface.
| Material Type | Peeling Pattern | Best Repair Approach |
|---|---|---|
| Genuine Leather | Scuffs and deep cracks | Leather binders and dyes |
| Bonded Leather | Flaking and delamination | Leather filler or self-adhesive patches |
| Faux/Vinyl | Tearing or \”skin\” peeling | Vinyl repair kits and color matching |
Understanding that leather sofa peeling repair is often more about \”resurfacing\” than \”healing\” is the first step to a fix that actually lasts. If your couch is bonded or faux, I focus on stabilizing the edges to stop the spread before applying any aesthetic fixes.
Assessing Damage Severity for Your Leather Sofa Peeling Repair
Before starting any DIY leather couch repair, I always evaluate the depth of the damage. Not all peeling is created equal, and your strategy depends entirely on how much of the surface has disintegrated. If you don\’t catch it early, a small flake can quickly turn into a massive eyesore.
Identifying Damage Levels
- Minor Peeling: You\’ll see small flakes or \”dandruff\” on the edges or headrests. This is usually just the top protective finish wearing thin and is the easiest to fix.
- Moderate Damage: This is where you see the fuzzy fabric backing through the cracks. At this stage, a simple recolor won\’t work; you need a leather repair kit to rebuild the surface.
- Severe Widespread Peeling: If large sheets of the surface are lifting like a sunburn, the bond between the coating and the base has failed.
Deciding if the Repair is Worth It
I recommend checking the couch\’s overall structure. If the peeling is confined to specific high-use areas, a bonded leather peeling fix is highly effective and saves you thousands. For moderate gaps and exposed backing, applying a specialized leather repair gel can stabilize the material and stop the shedding. However, if the entire sofa is crumbling, a patch might only be a temporary band-aid.
Pro Tip: If the damage covers more than 50% of the seating area, the labor for peeling leather couch repair might outweigh the cost of a new piece. Focus your energy on localized spots to get the best return on your time.
Essential Tools to Repair a Peeling Leather Couch
Before you start any DIY leather couch repair, gathering the right supplies is the difference between a patch that lasts and one that peels off in a week. Based on my experience, preparation is where most people fail, so I recommend having these items ready before you begin.
Cleaning Supplies for Prep
You cannot apply a fix to a dirty surface. Oils from skin and hair will ruin the adhesion of any leather repair patch kit.
- Leather Cleaner or Degreaser: Removes deep-seated grime.
- Rubbing Alcohol: Used sparingly to strip away leftover oils.
- Microfiber Cloths: Ensures a lint-free surface during the cleaning phase.
- Fine-Grit Sandpaper (600 grit): To gently smooth down the \”flaps\” of peeling material.
Repair Materials and Fillers
The type of damage dictates the product. For widespread flaking on faux or bonded furniture, self-adhesive leather patches are the most efficient way to get a clean, uniform look without the mess of liquid compounds.
- Leather Filler for Peeling: A flexible paste used to level the \”crater\” left behind when the top coating flakes off.
- Leather Binder: A liquid that strengthens the remaining base fibers.
- Colorant and Finish: To blend the filler into the original couch color.
Cost Guide for DIY Repairs
Repairing the piece yourself is significantly cheaper than hiring a pro or buying new furniture. Here is what I usually see for average project costs:
| Tool/Material | Estimated Price | Best Use Case |
|---|---|---|
| Self-Adhesive Patches | $10 – $25 | Fast fixes for large peeling sections |
| Leather Filler Kits | $20 – $45 | Deep cracks or minor localized peeling |
| Leather Dye/Paint | $15 – $30 | Refreshing faded or worn areas |
| Professional Reupholstery | $500+ | Full structural damage or high-end antiques |
Investing in a high-quality self adhesive leather patch or a dedicated filler kit now prevents the peeling from spreading across the entire cushion, saving you hundreds in replacement costs later.
Quick Repair with a Self-Adhesive Leather Patch
When I deal with peeling faux leather couch repair, I always recommend self-adhesive patches as the most efficient solution. Faux and bonded leathers peel because the synthetic top layer loses its grip on the fabric backing. A high-quality patch acts as a new protective skin, covering the damage and preventing further flaking.
Why Patches Work Best for Faux Leather
Unlike fillers that can crack on thin synthetic materials, a self adhesive leather patch offers the flexibility needed for seating areas. It is a one-and-done fix that restores the look of your furniture in minutes without the mess of dyes or glues.
How to Apply a Patch for a Clean Look
To ensure your leather sofa peeling repair lasts, follow these specific steps:
- Clean and Dry the Area: Use a lint-free cloth and a mild cleaner (or rubbing alcohol) to remove body oils and loose flakes. The surface must be 100% dry for the adhesive to bond.
- Measure and Cut: Cut your self-adhesive leather patch so it overlaps the damaged area by at least half an inch.
- Round the Corners: This is a pro tip—always use scissors to round the corners of the patch. Sharp corners are prone to catching on clothing and peeling up.
- Apply Pressure: Peel the backing and press the patch firmly onto the couch.
Smoothing Bubbles and Setting Adhesion
Once the patch is down, use the side of a credit card or your palm to smooth out any trapped air bubbles, working from the center toward the edges. For the best DIY leather couch repair results, let the adhesive cure for 24 hours before heavy use. The firm pressure and a clean surface are the \”secret sauce\” to making the repair look seamless and professional.
Professional Leather Filler and Recoloring Techniques
For high-end pieces where you want a seamless look, using a leather filler for peeling is often superior to using a patch. While patches are great for quick fixes, fillers allow for a smooth, integrated leather couch restoration that mimics the original texture. I recommend this method when the peeling is deep but localized, especially on genuine leather surfaces.
Here is how I approach the process for a professional finish:
- Apply a Leather Binder: Before filling, use a leather binder to strengthen the worn fibers. This is a critical step to how to repair leather furniture effectively by creating a stable, reinforced base.
- Layer the Filler: Apply thin layers of leather filler into the cracks or peeled areas. It is much better to do three thin coats than one thick one to prevent the material from cracking later.
- Sand for Smoothness: Once completely dry, lightly sand the area with fine-grit sandpaper (around 600 grit) until the repair is perfectly level with the surrounding material.
- Color Match Leather Repair: Use a sponge to dab on a matching leather dye or paint. Start from the center and feather the edges outward to ensure the fix is invisible.
- Seal the Surface: Always finish with a leather sealant or topcoat. This is the secret to how to stop leather couch from peeling again in the same spot by locking in the color and protecting the filler from friction.
This method requires more patience than a simple leather repair patch, but the result is a couch that looks and feels like it was never damaged. Maintaining a steady hand during the sanding and dyeing phases will determine the overall quality of the repair.
Painting and Recoloring Peeling Leather Spots
If you’re looking for a low-budget way to recolor peeling leather couch surfaces, painting is a highly effective method for covering small-to-midsize eyesores. This DIY leather couch repair technique is particularly useful when the top color has flaked away, leaving the pale fabric backing exposed. While it won\’t replace lost material, it visually blends the damage back into the rest of the sofa.
Step-by-Step Leather Paint Application
To get a finish that actually lasts, I follow a specific process to ensure the pigment bonds correctly to the material:
- Prep the surface: Clean the area thoroughly with rubbing alcohol to remove body oils and silicones that prevent paint adhesion.
- Apply in thin layers: Use a sponge or a soft-bristled brush to dab the paint onto the spot. Never pour it on directly.
- Build the color: It’s better to apply three thin coats than one thick one. This maintains the texture of the couch.
- Dry and seal: Use a hairdryer on a low, cool setting between coats to set the pigment.
For the best results, using a specialized leather sofa repair kit provides you with the professional-grade pigments and finishers needed to achieve an exact color match leather repair.
Flexibility and Longevity Warnings
While painting is a great leather sofa peeling repair hack, you need to be realistic about the results. Standard acrylics are too stiff; you must use paints specifically formulated for leather or vinyl. Because these materials flex when you sit down, a thick layer of paint will eventually crack and lead to more peeling. Always finish the job with a flexible topcoat or sealer to protect the new color from friction and moisture.
Common Mistakes to Avoid During Your Peeling Leather Couch Repair
When you\’re figuring out how to repair a peeling leather couch, it’s easy to reach for household items that actually do more harm than good. I\’ve seen many DIY projects fail because of a few simple, avoidable errors that turn a small fix into a total mess.
Why Super Glue and Duct Tape Fail
I strongly advise against using \”quick-fix\” adhesives like super glue or duct tape.
- Super Glue: It dries too rigid. Leather and vinyl need to flex; super glue will just crack and create sharp edges that speed up the peeling.
- Duct Tape: The adhesive is aggressive and will pull off more of the finish when you eventually try to remove it. It’s a temporary bandage that makes a permanent bonded leather peeling fix nearly impossible later on.
The Risk of Skipping the Cleaning Phase
The biggest mistake you can make is applying products to a dirty surface. If there is body oil, dust, or residue from old cleaners on the material, your leather repair patch kit or filler won\’t bond. Always use a dedicated leather cleaner or a mild alcohol wipe to prep the area. To get the best results, using a professional leather craft tool set ensures you have the right instruments to clean and prep the surface without causing further damage.
Avoiding Thick Layers That Crack
If you are using a leather filler for peeling, don\’t glob it on. Applying a single thick layer is a recipe for disaster.
- Ineven Drying: Thick layers dry on the outside while remaining wet inside, leading to bubbles.
- Future Cracking: Once dry, a thick patch lacks the flexibility of the surrounding material and will crack the first time someone sits down.
- The Solution: Apply multiple thin coats, allowing each to dry completely. This is the only way to stop a leather couch from peeling while maintaining a smooth, natural-looking finish.
How to Prevent Leather Sofa Peeling for Good
Once you’ve mastered how to repair peeling leather couch damage, the next step is ensuring it doesn\’t happen again. Maintenance is much cheaper than restoration, and a few simple habits will keep your furniture looking new for years.
Routine Conditioning and Cleaning
The biggest enemy of any leather surface is dryness. Without moisture, the top layer becomes brittle and loses its flexibility, leading to cracks.
- Weekly Dusting: Use a dry microfiber cloth to remove dust and grit that can act like sandpaper on the finish.
- Deep Conditioning: Apply a professional leather conditioner every 6 to 12 months. This keeps the fibers or synthetic layers supple.
- Avoid Harsh Chemicals: Never use bleach, ammonia, or multi-purpose sprays. These strip the protective coating and accelerate repairing a leather couch needs.
Control Sunlight and Heat Exposure
Heat and UV rays are the primary causes of prevent leather sofa peeling failures. They bake the material, causing it to shrink and delaminate from its fabric backing.
- Positioning: Keep your couch at least two feet away from radiators, fireplaces, or heating vents.
- Window Treatments: Use curtains or UV-blocking window film if your sofa sits in a sun-drenched spot. Direct afternoon sun can ruin a faux leather finish in a single season.
Temperature and Humidity Management
Extreme fluctuations in your home environment can cause materials to expand and contract, weakening the bond between layers.
- Ideal Humidity: Keep your home between 40% and 50% humidity.
- Airflow: Ensure there is adequate airflow around the furniture to prevent moisture buildup, which can also degrade the adhesives used in bonded leather.
| Prevention Factor | Frequency | Why It Matters |
|---|---|---|
| Conditioning | Every 6-12 Months | Maintains flexibility and prevents cracks. |
| UV Protection | Constant | Stops color fading and material breakdown. |
| Gentle Cleaning | Weekly | Removes abrasive dirt and oils. |
| Heat Distance | Permanent | Prevents the material from drying and shrinking. |
When to Call a Professional for Your Peeling Leather Couch
While most peeling faux leather couch repair tasks are manageable at home, some situations require a specialist. Knowing how to repair peeling leather couch damage effectively involves recognizing when the material is too far gone for a simple leather repair patch kit. If the structural integrity of the seat is compromised or the flaking is systemic, professional intervention is often the only way to save the piece.
Signs Your Couch Is Beyond a DIY Fix
- Structural Damage: If the internal foam is exposed or the frame is sagging alongside surface peeling.
- Widespread Failure: When more than 50% of the surface is shedding, making a leather sofa peeling repair impractical for one person.
- Deep Tears: Rips that extend through the fabric backing where a standard leather filler for peeling cannot provide enough support.
- Antique Preservation: High-end, top-grain leather that requires specialized pH-balanced restoration and expert color matching.
Cost Comparison: DIY vs. Reupholstery vs. New Couch
| Method | Estimated Cost | Best Use Case |
|---|---|---|
| DIY Repair | $20 – $70 | Minor flakes and localized bonded leather peeling fix. |
| Pro Reupholstery | $600 – $2,500 | High-quality frames or sentimental family heirlooms. |
| Buying New | $800 – $4,000+ | When the cost of repair exceeds the value of the couch. |
For localized issues, our professional-grade leather sofa repair set is the most cost-effective way to stop leather couch from peeling further and restore its appearance. However, if your couch is a high-value item with extensive damage, a professional upholsterer can replace entire panels with genuine leather, ensuring the piece lasts for another decade. Choosing a leather sofa repair kit for smaller fixes remains the smartest first step before committing to the high expense of professional services.

