Understanding Leather Seat Damage
Staring at a cracked bolster or a sun-faded headrest can make any car interior look neglected. Before you consider spending thousands on a total replacement, you need to identify the specific type of wear affecting your vehicle. Most damage is not a death sentence for your interior; it is simply a sign that the leather has lost its essential oils and protection.
Common Types of Leather Wear
Leather is a durable material, but it isn\’t invincible. The most frequent issues we see include:
- Spider-Web Cracking: Fine, interconnected surface cracks caused by dryness.
- Sun Fading: UV rays bleaching the pigment out of the leather.
- Deep Gouges and Scratches: Physical damage from keys, pets, or sliding in and out of the seat.
- Peeling: Often a sign that the original factory finish is failing.
Why Car Seats Crack and Peel
The environment inside a car is harsh. Between extreme temperature shifts and constant friction, the leather’s natural moisture evaporates. Once the leather becomes brittle, the mechanical stress of sitting causes the fibers to snap, resulting in visible cracks. Using a leather crack filler and a dedicated recoloring balm can reverse this process by restoring both the structure and the aesthetic.
Repair vs. Replace: Making the Call
Most owners assume that once a seat looks \”old,\” it’s time for a professional upholstery shop. However, a DIY leather repair is often the smarter financial move.
| Feature | DIY Restoration | Professional Reupholstery |
|---|---|---|
| Cost | Fraction of the price | High (hundreds per seat) |
| Effort | Simple 4-step process | Logistics of leaving the car at a shop |
| Durability | Permanent color and fill | New material longevity |
| Authenticity | Maintains original leather | Replaces with new (sometimes mismatched) |
Benefits of Fixing Damage Early
If you repair leather seat damage as soon as you notice \”spider-webbing,\” you prevent the cracks from turning into deep tears. Early intervention with a leather car seat restoration system keeps the damage localized and ensures a \”like-new\” finish. Waiting too long allows the leather to lose its integrity, making the eventual fix more complex. Taking action now preserves the value of your vehicle and keeps your cabin looking sharp.
Why a Simple Patch Beats Complex Repair Kits
Choosing to repair leather seat damage shouldn\’t feel like a chemistry project. Traditional multi-step liquid kits require you to deglaze, apply leather filler for cracks, and wait days for layers to dry. If the environment is too humid or you apply too much heat, the repair can fail and peel off. A self-adhesive leather patch solves these problems instantly.
The Advantage of Micter for Car Interiors
I have found that Micter is a total game-changer for car interiors because it is designed to handle high-traffic areas like seat bolsters. While a professional upholstery shop might charge $200 or more for a single panel replacement, a DIY patch provides realistic, durable results for a fraction of that cost. It is especially effective for repairing peeling leather seats where liquid fillers often struggle to bond properly.
| Repair Method | Time Required | Ease of Use | Durability |
|---|---|---|---|
| Professional Shop | 3-5 Days | Hands-off | High |
| Liquid Kits | 48 Hours | Difficult | Moderate |
| Micter Patch | 5 Minutes | Extremely Easy | High |
Using a high-quality leather patch is the best leather repair kit option for car owners who want a permanent, peel-and-stick solution. It handles the constant friction and weight of passengers far better than thin layers of restoration balm or paint. You can expect a clean, seamless look that stops tears from spreading without the mess of chemicals.
Essential Supplies to Repair Leather Seat
To achieve a factory-finish DIY leather seat restoration, you need a specific set of tools. Using the right supplies ensures the repair is permanent and won\’t rub off on your clothes once cured. I recommend gathering everything before you start to ensure the process remains streamlined and effective.
The Preparation Toolkit
Before applying any color or filler, the surface must be perfectly prepped. A clean slate is the only way to guarantee the repair sticks.
- 400-600 Grit Sandpaper: Essential for smoothing out \”spider-web\” cracking and scuffed fibers.
- Leather Preparation and Deglazer: This removes old finishes, silicones, and body oils that would otherwise prevent the repair from bonding.
- Microfiber Cloths: Used for lint-free cleaning and applying the leather repair gel to deep gouges or scratches.
- The Water Drop Test: Always test your leather’s absorbency by placing a drop of water on it; if it soaks in, the leather is ready for the balm.
Choosing the Right Materials
Matching the repair method to your specific damage is the key to a seamless look. For deep damage, you need a high-quality leather repair filler to level the surface. If you are dealing with a larger hole or a structural tear, a leather repair patch is the most reliable way to provide a durable, immediate fix that lasts.
When choosing your recoloring balm, ensure it matches your interior’s original shade to hide sun-faded areas. You will also need a hair dryer to speed up the drying process between layers, especially when building up filler or applying multiple coats of color.
Final Maintenance Supplies
Don\’t overlook the final step of a leather car seat repair. Once the color has dried for at least 24–48 hours, a specialized conditioning cream is necessary. This provides essential moisture and protection to the newly restored area, keeping the leather supple and preventing future UV damage or friction-based cracking.
Step-by-Step Guide: How to Repair Leather Seats
I have found that the secret to a professional-grade repair leather seat project is following a strict, logical workflow. By using a specialized restoration system, I can return a damaged interior to a \”like-new\” state without the high cost of a professional shop.
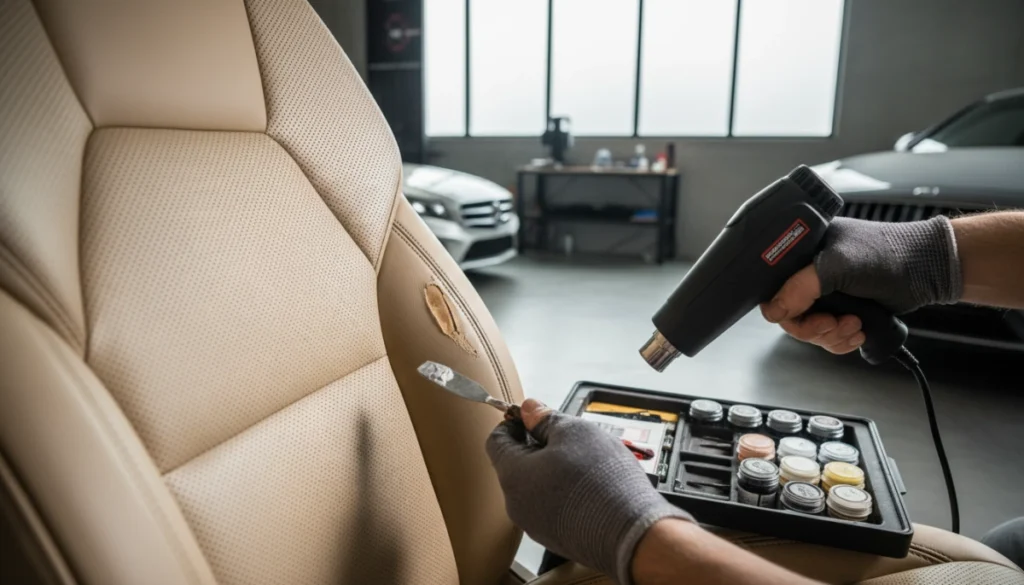
Step 1: Prepare and Degrease
I start by stripping away years of built-in oils, waxes, and old finishes. I use a dedicated leather deglazer along with 400-600 grit sandpaper. This creates a clean slate and ensures the repair materials bond permanently. A thorough car leather seat repair depends entirely on this preparation; without it, the new finish won\’t stick.
Step 2: Repair and Fill Cracks
For deep gouges or \”spider-web\” cracks, I use a high-quality leather repair filler.
- Trim: I carefully cut away any frayed fibers or loose edges to prevent them from sticking up.
- Apply: I spread the filler into the cracks or holes until the surface is level.
- Dry: I use a hair dryer to speed up the curing process.
- Sand: Once dry, I sand the area again to ensure the edges are flush and smooth.
Step 3: Recoloring for a Seamless Finish
Next, I apply a recoloring balm to restore the pigment. This step is critical for a repair on a cracked leather car seat because it hides the filler and blends the damaged area with the rest of the seat. I apply the balm in thin layers, allowing it to absorb and dry between coats until the color is deep and uniform.
Step 4: Conditioning and Protection
The final step in my DIY leather seat restoration is to seal the work. I wait 24 to 48 hours for the color to fully set, then I apply a leather conditioning cream. This adds essential moisture back into the leather and provides a protective barrier against UV damage and friction, ensuring the color won\’t rub off on clothing.
Pro Tips for Maintenance and Prevention
Maintaining your interior after a repair leather seat project is the only way to ensure your hard work stays looking \”like-new.\” Leather is essentially skin; if it dries out or is neglected, it will eventually crack again. To prevent leather seat damage, I recommend a simple but strict maintenance schedule that focuses on hydration and protection.
Routine Cleaning to Stop Future Cracks
Dirt and body oils are the silent killers of premium interiors. Over time, these contaminants break down the protective topcoat, leading to the \”spider-web\” cracking that makes leather car seat repair necessary.
- Vacuum Weekly: Remove crumbs and grit from the seams. This debris acts like sandpaper against the leather every time you sit down.
- Wipe Down: Use a damp microfiber cloth to remove surface oils and perspiration.
- Condition Regularly: Apply a high-quality leather conditioning cream every 3–6 months. This keeps the fibers supple and prevents the need for leather seat crack repair in the future.
UV Protection for Car Interiors
The sun’s UV rays are responsible for the majority of faded leather seat recolor issues. Constant exposure dries out natural oils, making the material brittle and prone to peeling.
- Use Sunshades: Always place a UV reflector in your windshield when parked outdoors.
- Window Tinting: High-quality window tints can block a significant portion of harmful radiation.
- UV-Rated Protectants: When finishing your car interior leather restoration, choose maintenance products that specifically mention UV inhibitors to shield the pigment from sun bleaching.
Handling Sharp Objects and Scuffs
Most leather seat tear patch applications are caused by preventable accidents. Being mindful of what enters your vehicle can save you hours of restoration work later.
- Pocket Hardware: Keys, pocket knives, and metal rivets on jeans are the primary culprits for deep gouges and scratches.
- Pet Claws: If you travel with pets, use a dedicated seat cover to avoid punctures that would require leather filler for cracks.
- Proper Equipment: If you find yourself needing to fix a loose seam during your DIY leather seat restoration, using professional leather craft tools ensures you can reinforce the area without causing further jagged tears.
Knowing When to Call a Professional
While a leather repair kit for car seats handles 90% of common wear like scuffs, fading, and \”spider-web\” cracks, some damage is structural. If the leather has completely shrunk away from the frame or if the internal foam cushion is crumbling, a DIY fix may only be a temporary bandage. In these rare cases, a professional upholsterer may be needed to replace the entire panel. For everything else, staying consistent with cleaning and conditioning will keep your repair leather seat results looking flawless for years.

