Staring at fresh claw marks on your favorite furniture? It’s every pet owner’s nightmare.
But here’s the good news: You don’t need to pay for expensive professional reupholstery.
In this guide, you’re going to learn exactly how to repair leather chair cat scratch damage yourself, step by step.
From fixing light surface scuffs to restoring deep gouges with Micter leather repair patches, we cover the most effective methods to get your chair looking new again.
Let’s get those scratches fixed.
Assessing the Damage
Before we dive into how to repair leather chair cat scratch marks, we need to diagnose the severity of the \”injury.\” We know that sinking feeling when you see fresh claw marks, but identifying the specific type of damage is the critical first step to a seamless fix.
Identifying the Severity of Cat Scratches
Cat claws can inflict two main types of damage on leather furniture. We need to distinguish between cosmetic surface issues and structural fiber damage:
- Light Scratches (Surface-Only): These often appear as straight lines where the claw has only damaged the protective coating or lacquer. The leather itself is intact, but the color might look slightly lighter.
- Moderate to Severe (Fiber Damage): This is the most common issue with cats. The claws have punctured the leather, pulling the fibers out. This results in a \”fuzzy\” or unsightly texture known as pilling. In severe cases, you might see deep gouges or actual holes.
The Quick Tactile Test
To confirm what you are dealing with, simply run your finger over the damaged area:
- Smooth: If it feels relatively smooth, you are likely dealing with surface scratching.
- Rough: If it feels rough or you can feel loose strands, the leather fibers have been compromised.
When to DIY vs. Professional Help
Can you fix this yourself? Absolutely. We use the \”Tennis Ball Rule\” to decide the best approach for a DIY leather scratch repair:
- Smaller than a tennis ball: This is a minor repair perfect for a simple touch-up kit.
- Larger than a tennis ball: For extensive damage covering a wide area (like an entire armrest), you can still DIY, but you will need a complete restoration kit with a binder and colorant to ensure a professional finish. Professional help is rarely needed unless the leather is ripped entirely through or the structure of the chair is compromised.
Tools and Materials for DIY Leather Scratch Repair
To successfully repair leather chair cat scratch damage, you need a specific set of supplies. The difference between a patchy job and a professional finish often comes down to using the right grit of sandpaper and the correct chemical compounds. Whether you are tackling a car leather scratch repair or fixing the family sofa, here is what I recommend having on hand.
Essential Cleaning and Prep Supplies
Before applying any fillers, the surface must be sterile and smooth.
- Cleaning Fluid: A dedicated leather cleaner or mild soap solution.
- Alcohol Cleaner: Absolutely mandatory for degreasing the area so the colorant sticks.
- Abrasives: 1200-grit sandpaper is the standard. It is fine enough to smooth the leather binder without causing fresh scratches.
- Lint-Free Cloths: For wiping down residue.
Structural Repair Chemicals
If you are opting for a full restoration to fix fiber damage and pilling:
- Leather Binder: This fluid soaks into the leather fibers to strengthen them.
- Heavy Filler: A thick paste required for filling deep gouges or holes.
- Colorant & Sealant: You need a base color and a top-coat lacquer (finish) to lock it in.
Application Tools
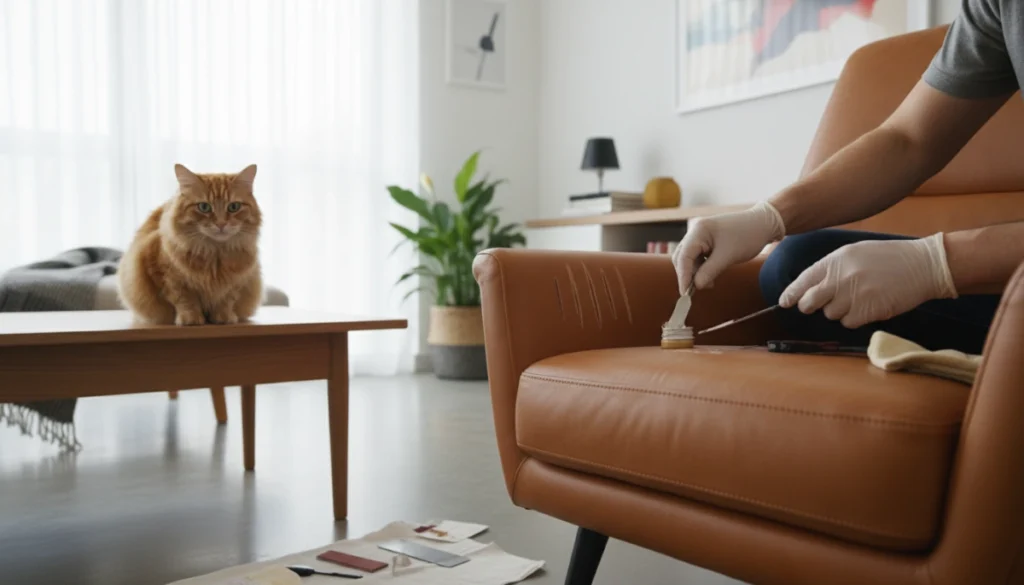
Precision is key when applying filler. You shouldn\’t use your fingers. I suggest using a palette knife or spatula to spread the filler evenly into the damage. A versatile 11-set Micter leather craft tools kit includes the exact instruments needed to apply these compounds smoothly and blend the edges for a seamless look. A hairdryer is also useful to speed up the drying time between layers.
The Quick Fix: Micter Patches
If the list above looks too time-consuming, I always keep Micter leather repair patches in stock. These are self-adhesive, flexible, and designed to cover the damage instantly without the need for sanding, binding, or painting. It is the most efficient way to hide cat claw marks if you aren\’t ready for a multi-step chemical restoration.
Preparation Steps for Leather Repair
Before I start any restoration work to repair leather chair cat scratch marks, I ensure the surface is perfectly prepped. If you skip this phase, the binder and filler simply won\’t stick, and your repair will peel off within days.
- Clean the Area: Start by removing surface dirt and grease with a dedicated leather cleaner. This reveals the true extent of the damage and prevents contaminants from ruining the bond.
- Trim Loose Fibers: Cat claws often leave the leather looking \”hairy\” or pilled with raised fibers. Take a pair of sharp scissors and carefully snip these long fibers down until they are level with the surface. Do not pull them, as this will unravel the leather structure further and create a bigger hole.
- Degrease: Wipe the entire area with an alcohol-based cleaner. This removes any remaining oils and is mandatory for ensuring the colorant and fillers adhere correctly.
- Protect: Use masking tape to cover any nearby stitching or piping that you want to keep free from filler and dye.
Getting this base right is essential for a professional finish. If the damage covers a massive area and this detailed process seems too tedious for your needs, applying a high-quality self-adhesive leather patch can be a much faster alternative for immediate coverage. However, for a seamless restoration using fillers and binders, these specific prep steps are non-negotiable.
Step-by-Step Guide to Repair Leather Chair Cat Scratches
If you have decided to tackle the restoration yourself for a professional finish, follow this proven method. This process focuses on structural integrity first, ensuring the damage doesn\’t return.
Step 1: Strengthen Weak Fibers
Cat claws don\’t just cut leather; they pull the fibers out, creating a fuzzy texture. To fix this, apply a Leather Binder. You need to apply 8–10 thin coats using a sponge, pressing firmly to ensure the liquid soaks deep into the leather structure. This solidifies the loose fibers. Once dry, lightly sand the area with 1200-grit sandpaper to remove any roughness.
Step 2: Fill Deep Gouges
For severe scratches that have cut into the leather hide, use a Heavy Filler.
- Apply the filler in thin layers using a spatula or palette knife.
- Do not try to fill a deep hole in one go.
- Allow each layer to dry for roughly 20–25 minutes before applying the next.
Step 3: Sand and Prep
Once the filler is level with the surface, sand it smooth using your 1200-grit paper. The repair must be flush with the surrounding leather. Crucial Step: Wipe the entire area with an alcohol cleaner. This removes dust and grease, ensuring the colorant adheres properly.
Step 4: Restore the Color
Apply your Leather Colorant. Sponge on the first layer to establish a base coat. Then, apply subsequent layers (by sponge or spray) to build up the opacity until the repair blends seamlessly with the rest of the furniture. This is essential to restore scratched leather armchair surfaces to their original look.
Step 5: Seal for Protection
To make the repair durable, use a two-stage sealing process:
- Super Seal: Apply 3–4 coats to add flexibility and robustness.
- Leather Finish: Apply 4–5 coats to match the sheen (matte, satin, or gloss) and lock in the color.
Quick Alternative: The Micter Solution
If the process above involves too many chemicals and drying times for your schedule, there is a simpler way. You can use our specialized self-adhesive patches to repair leather seat damage in seconds. This method skips the sanding and painting, offering a durable cover-up that withstands daily wear with minimal effort.
Using Micter Patches: The Simplest Solution
If the multi-step process of binders and fillers feels too technical, I offer a much faster alternative. For many busy pet owners, the priority is to repair leather chair cat scratch damage instantly and stop it from getting worse. This is where our self-adhesive leather patches stand out as the most efficient solution. Unlike liquid repairs that require drying time, these patches provide an immediate, durable shield over the damaged area.
Why Micter patches work:
- Self-Adhesive: Strong backing ensures the patch stays in place, even on high-traffic seating areas.
- Flexible: The material mimics natural leather, flexing with the cushion rather than peeling up.
- Color-Matched: Designed to blend with common furniture tones for a discreet finish.
Simple Application Process:
- Cut: Trim the patch to size with scissors (round the corners to prevent peeling).
- Peel: Remove the protective backing.
- Stick: Press firmly over the scratched area.
- Blend: Smooth the edges for a seamless look.
You can expect a massive improvement in seconds. While liquid kits rebuild the surface, these patches act as the best leather patch for scratches, offering an invisible leather repair for cat claws that requires zero drying time and minimal effort.
Preventing Future Cat Scratches
Once I have successfully managed to repair leather chair cat scratch damage, my focus immediately shifts to protection. There is nothing more frustrating than fixing a surface only to find fresh claw marks the next day. To stop cat scratching leather chair surfaces permanently, we need to redirect the behavior rather than just punishing it.
Here are the most effective methods to protect your investment:
- Alternative Scratching Surfaces: Place a sturdy scratching post right next to the leather furniture. Sisal or heavy cardboard usually works best. If the cat has a better option nearby, they are less likely to target the leather.
- Deterrents: Cats dislike sticky sensations and strong citrus scents. Applying double-sided training tape or clear furniture guards to the corners can make the chair unappealing.
- Environmental Adjustments: Keep your cat\’s claws trimmed regularly to minimize accidental damage.
If your pet is persistent, you might need to use protective covers temporarily while training them. However, if accidents do happen, knowing how to repair cat scratch on leather sofa ensures you can maintain the durable leather repair pet owners require. Consistent training combined with these physical barriers is the key to long-term preservation.
Common Mistakes to Avoid When You Repair Leather Chair Cat Scratch
When I tackle a cat damaged leather couch fix, I have learned that patience is just as important as the products I use. Rushing through the process usually leads to results that look worse than the original claw marks. To ensure your leather chair repair cat scratch project looks professional and lasts a long time, you need to dodge these specific pitfalls.
- Skipping Preparation Steps: It is tempting to jump straight to the filler, but this is a recipe for failure. If you do not clean the grease and trim the loose fibers first, the repair materials will not bond to the leather. A successful DIY leather scratch repair always starts with a perfectly clean, degreased, and smooth surface.
- Applying Too Much Filler at Once: This is the most frequent error I see. Slathering on a thick layer of filler causes cracking, shrinking, and uneven drying. Instead, apply thin layers of high-quality leather repair gel to gradually build up the surface until it is level with the surrounding area.
- Poor Color Matching: If the color is slightly off, your repair will stand out like a sore thumb rather than blending in. Always test your colorant in an inconspicuous area first. The goal is an invisible leather repair cat claws can\’t claim credit for, so take the time to mix the shade perfectly.
- Not Sealing the Repair Properly: You might think you are done after coloring, but skipping the sealant leaves the area vulnerable to friction and moisture. Without a protective top coat, the color will rub off quickly, and you won\’t get that durable leather repair pet owners need to withstand daily use.

