Leather furniture adds a touch of elegance and coziness to any room.
But as beautiful and durable as it is, leather isn’t immune to damage. Over the years, scratches, cracks, and even tears can appear—especially on frequently used sofas and chairs. The good news? You don’t always need a costly professional repair service or complete reupholstery. With the right tools and a bit of know-how, you can repair your leather furniture at home.
In this article, we’ll show you an easy DIY method to restore your leather items and make them look refreshed again.
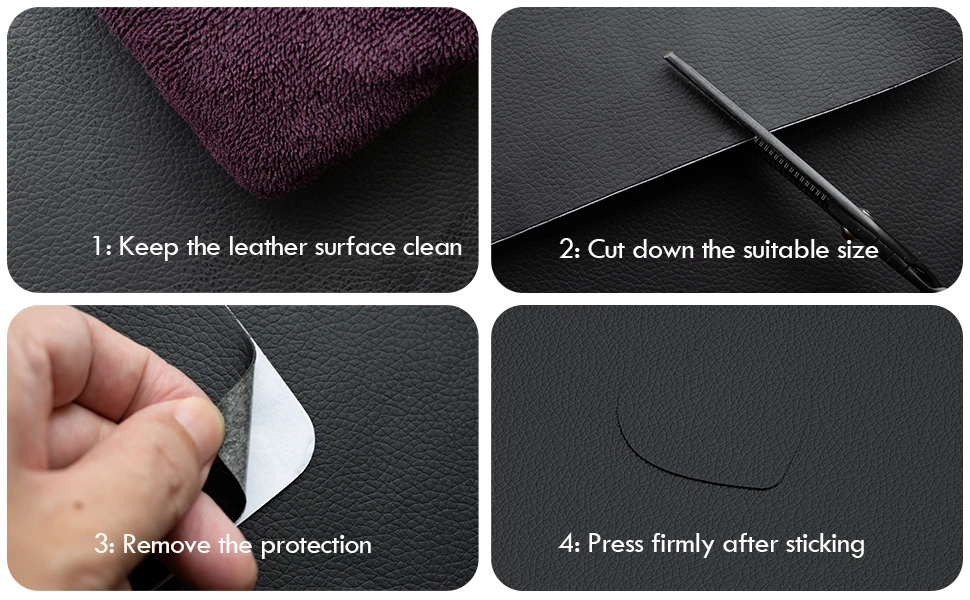
Step-by-Step Guide to Using Leather Repair Patches
Step 1: Clean the Damaged Area
Before anything else, make sure the damaged surface is completely clean. Use a soft, damp cloth to gently wipe away dust, dirt, and oils that may have built up over time. If the leather has stubborn stains or grease, apply a mild leather cleaner and let it dry thoroughly. Any residue left behind—like moisture, crumbs, or oil—will reduce the adhesive power of the patch, so take a few extra minutes to ensure the surface is spotless and fully dry before moving on.
Step 2: Cut Out the Right Shape
Next, measure the tear or worn spot carefully. Using a pair of sharp scissors, cut the patch so that it’s slightly larger than the damaged area—this ensures full coverage and prevents the edges of the tear from lifting again. For the cleanest look, trim the patch into rounded corners rather than leaving sharp, square edges. Rounded shapes blend more naturally with the leather surface and also hold better over time, since square corners are more prone to peeling. Take your time to adjust the size and shape until you’re satisfied with how it will look.
Step 3: Peel Off the Backing Paper
Once you have your patch ready, gently remove the protective backing to expose the adhesive layer. Be careful not to touch the sticky surface too much, as oils from your fingers can weaken the bond. If the patch is large, peel a small section of the backing first to help with positioning, then gradually remove the rest as you press the patch down.
Step 4: Apply and Press Firmly
Carefully place the patch over the damaged spot and make sure it’s aligned properly. Press it down with steady pressure, beginning at the center and moving outward. This helps to smooth out air bubbles and create a secure, even attachment. Spend extra time reinforcing the edges so they stay firmly in place.
Why Use Leather Repair Patches?
- Cost-effective – Avoid expensive professional repairs or full replacements.
- Quick fix – Repairs can be done in minutes, with no special tools required.
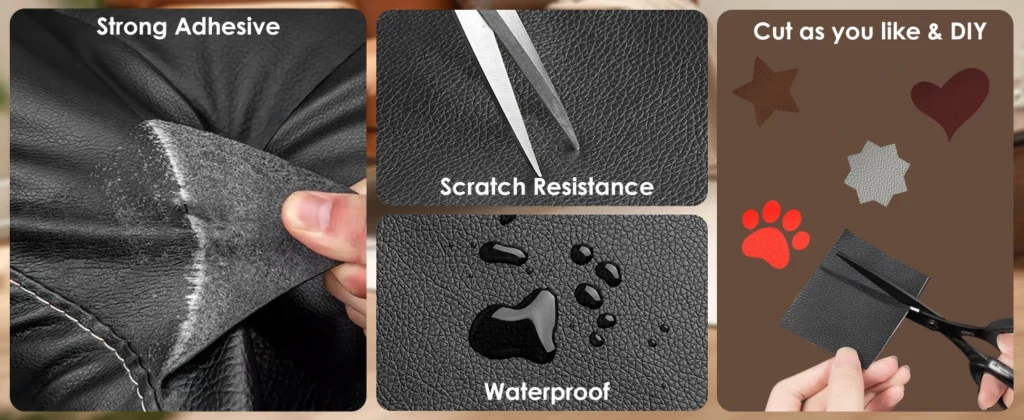
- Durability – High-quality patches provide strong adhesion and long-lasting results.
- Versatility – Works for sofas, chairs, car interiors, bags, jackets, and more.
- Color options – Available in multiple shades to match different types of leather.
Final Thoughts
Leather repair patches are a game-changer for anyone who wants to extend the life of their furniture, car seats, or accessories. They’re affordable, easy to use, and can make worn-out items look almost new again. Instead of hiding that scratch with a throw blanket or replacing an expensive piece, try this DIY solution—you’ll be surprised at how effective it is.


