Understanding Leather Colorfastness: What It Is and Why It Matters
Ever spent hours restoring a leather couch, only to have the dye rub off on your clothes the next day? I see this happen constantly with DIY projects. To achieve a professional, long-lasting finish, you need to understand the exact science of leather colorfastness.
The Mechanics of Color Bleeding and Fading
Colorfastness simply refers to how well leather holds onto its color without fading, bleeding, or transferring onto other materials. If you want to effectively prevent leather color transfer, you first have to know what type of material you are working with:
- Aniline (Dyed) Leather: This leather is dyed completely through. It feels incredibly soft and natural but is highly porous, making it exceptionally prone to fading and liquid damage.
- Pigmented Leather: This type features a protective surface coating of color. It is much more durable for daily use, but if that top layer fails, the color easily flakes, peels, or rubs off.
Primary Culprits Behind Poor Color Retention
If you are looking into fading prevention for a leather sofa or trying to stop leather color bleeding on a favorite car seat, you must identify the enemy. Several daily factors actively destroy colorfastness:
- UV and Sunlight Exposure: Photodegradation breaks down the chemical bonds in dyes, leading to severe sun damage and rapid color loss.
- Friction and Daily Wear: Constant physical rubbing gradually wears down the factory protective coating, exposing the raw pigment underneath.
- Body Oils and Sweat: Human and pet oils naturally degrade leather finishes over time. This causes leather pigment migration, where the color begins to float and separate from the hide.
- Improper Cleaning Chemicals: Using standard household surface cleaners strips the leather’s natural oils and aggressively destroys its protective seal.
Understanding these underlying causes is the essential first step in any guide to improving leather colorfastness in home repairs. When you know exactly why the color fails, you can permanently lock it in.
Crucial Pre-Repair Steps for Maximum Dye Adhesion
When I start a home leather repair project, the biggest mistake I see people make is rushing straight to the coloring phase. Skipping the preparation work is a guaranteed way to ruin your leather colorfastness. If you want the new color to grab onto the material and stay there, you have to prepare the canvas correctly.
Deep Cleaning and Degreasing
Over time, leather absorbs a massive amount of body oils, sweat, and environmental grime. If you apply dye over these contaminants, the color will simply float on top of the grease and eventually peel off. This is where a high-quality leather prep and deglazer becomes non-negotiable.
- Scrub out the oils: Use a dedicated leather cleaner and a soft-bristled brush to lift embedded dirt.
- Wipe away residue: Follow up with a degreaser to strip away the stubborn body oils that standard cleaners leave behind. This step is vital to stop leather color bleeding later on.
Removing the Old Factory Finish
Most leather furniture and car seats come with a factory clear coat. If you don\’t remove this barrier, your new dye cannot penetrate the material. Mastering proper leather dye adhesion techniques starts with deglazing.
- Strip the topcoat: Apply your deglazer with an abrasive pad to break down the old, glossy finish. You want the leather to look dull—this means the pores are open and ready to accept color.
- Sand lightly: Use fine-grit sandpaper (around 600 to 800 grit) to gently scuff the surface. The goal is to create texture for the dye to grip, not to tear through the actual leather grain. Using dedicated Micter leather making tools ensures you have the precise equipment needed to handle this delicate sanding process safely.
- Clean again: Always wipe the surface down with an alcohol-based cleaner to remove the sanding dust before you open your dye.
Techniques for Applying Color That Lasts
When I tackle leather colorfastness in home restorations, the actual application process is where the magic happens. How you apply the color determines whether your repair will last for years or peel off in a week.
The Rule of Thin, Even Coats
It is incredibly tempting to slather on a thick layer of DIY leather restoration dye to hide damage fast. I always advise against this.
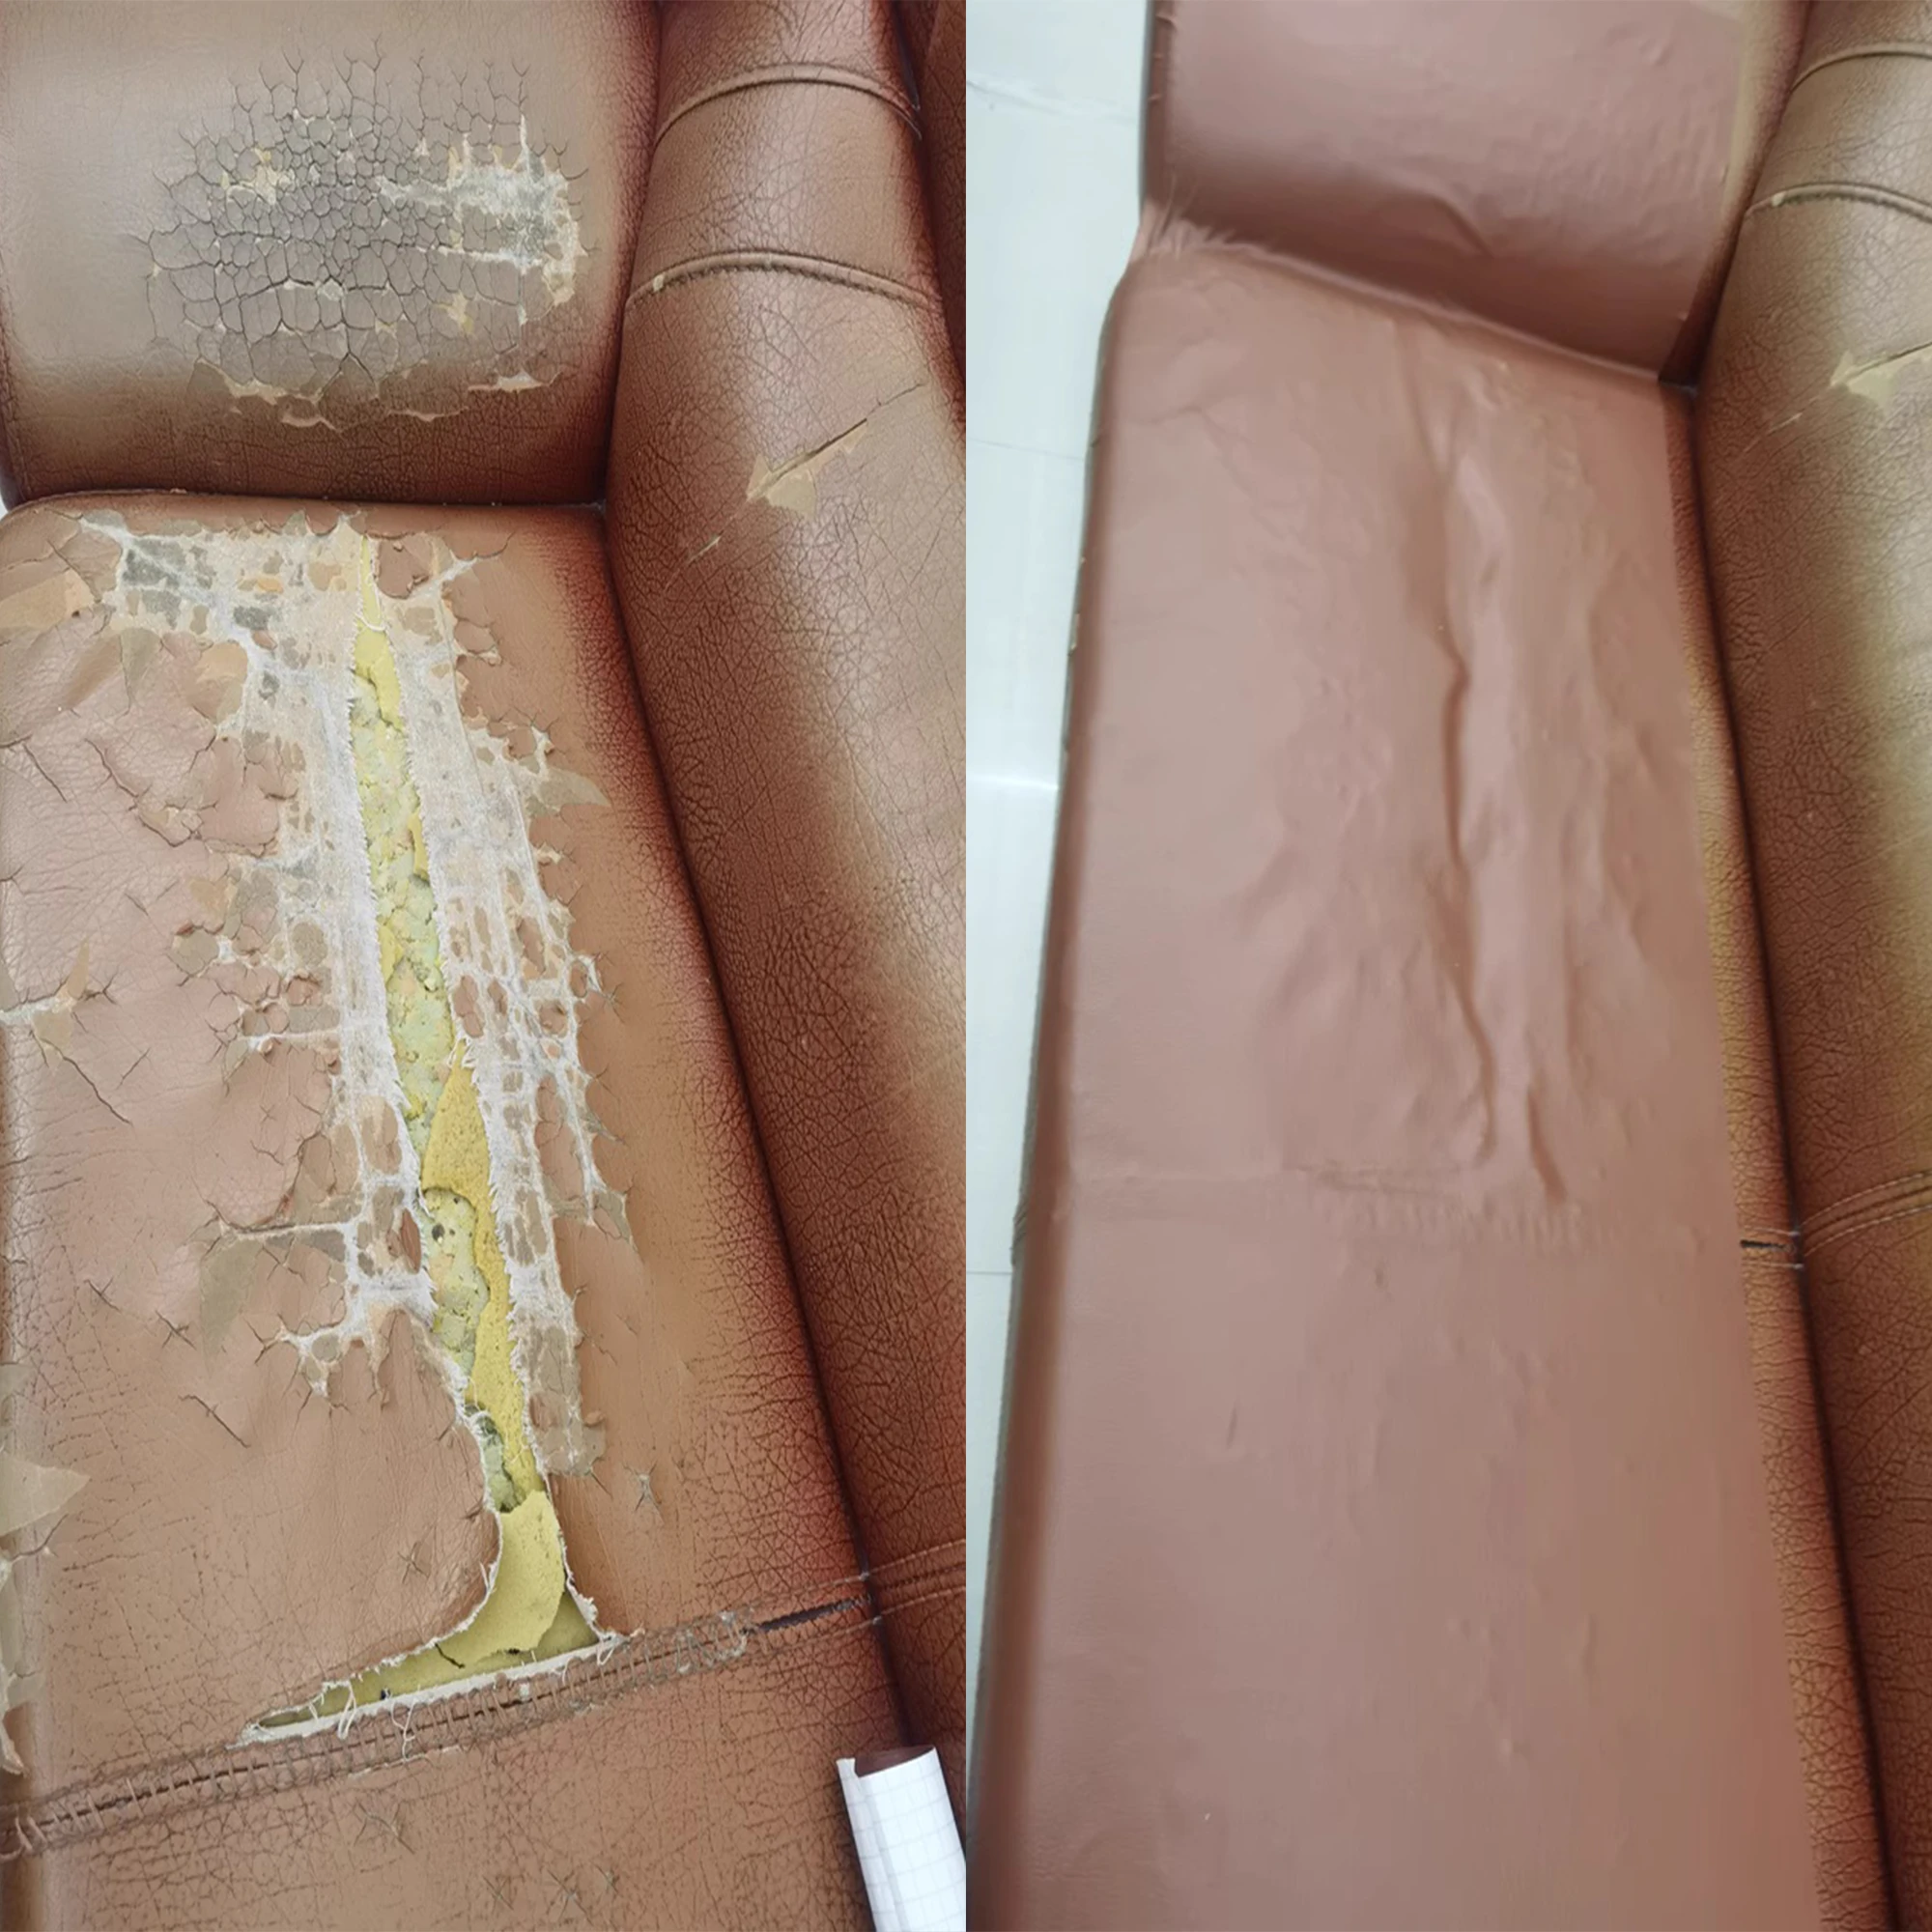
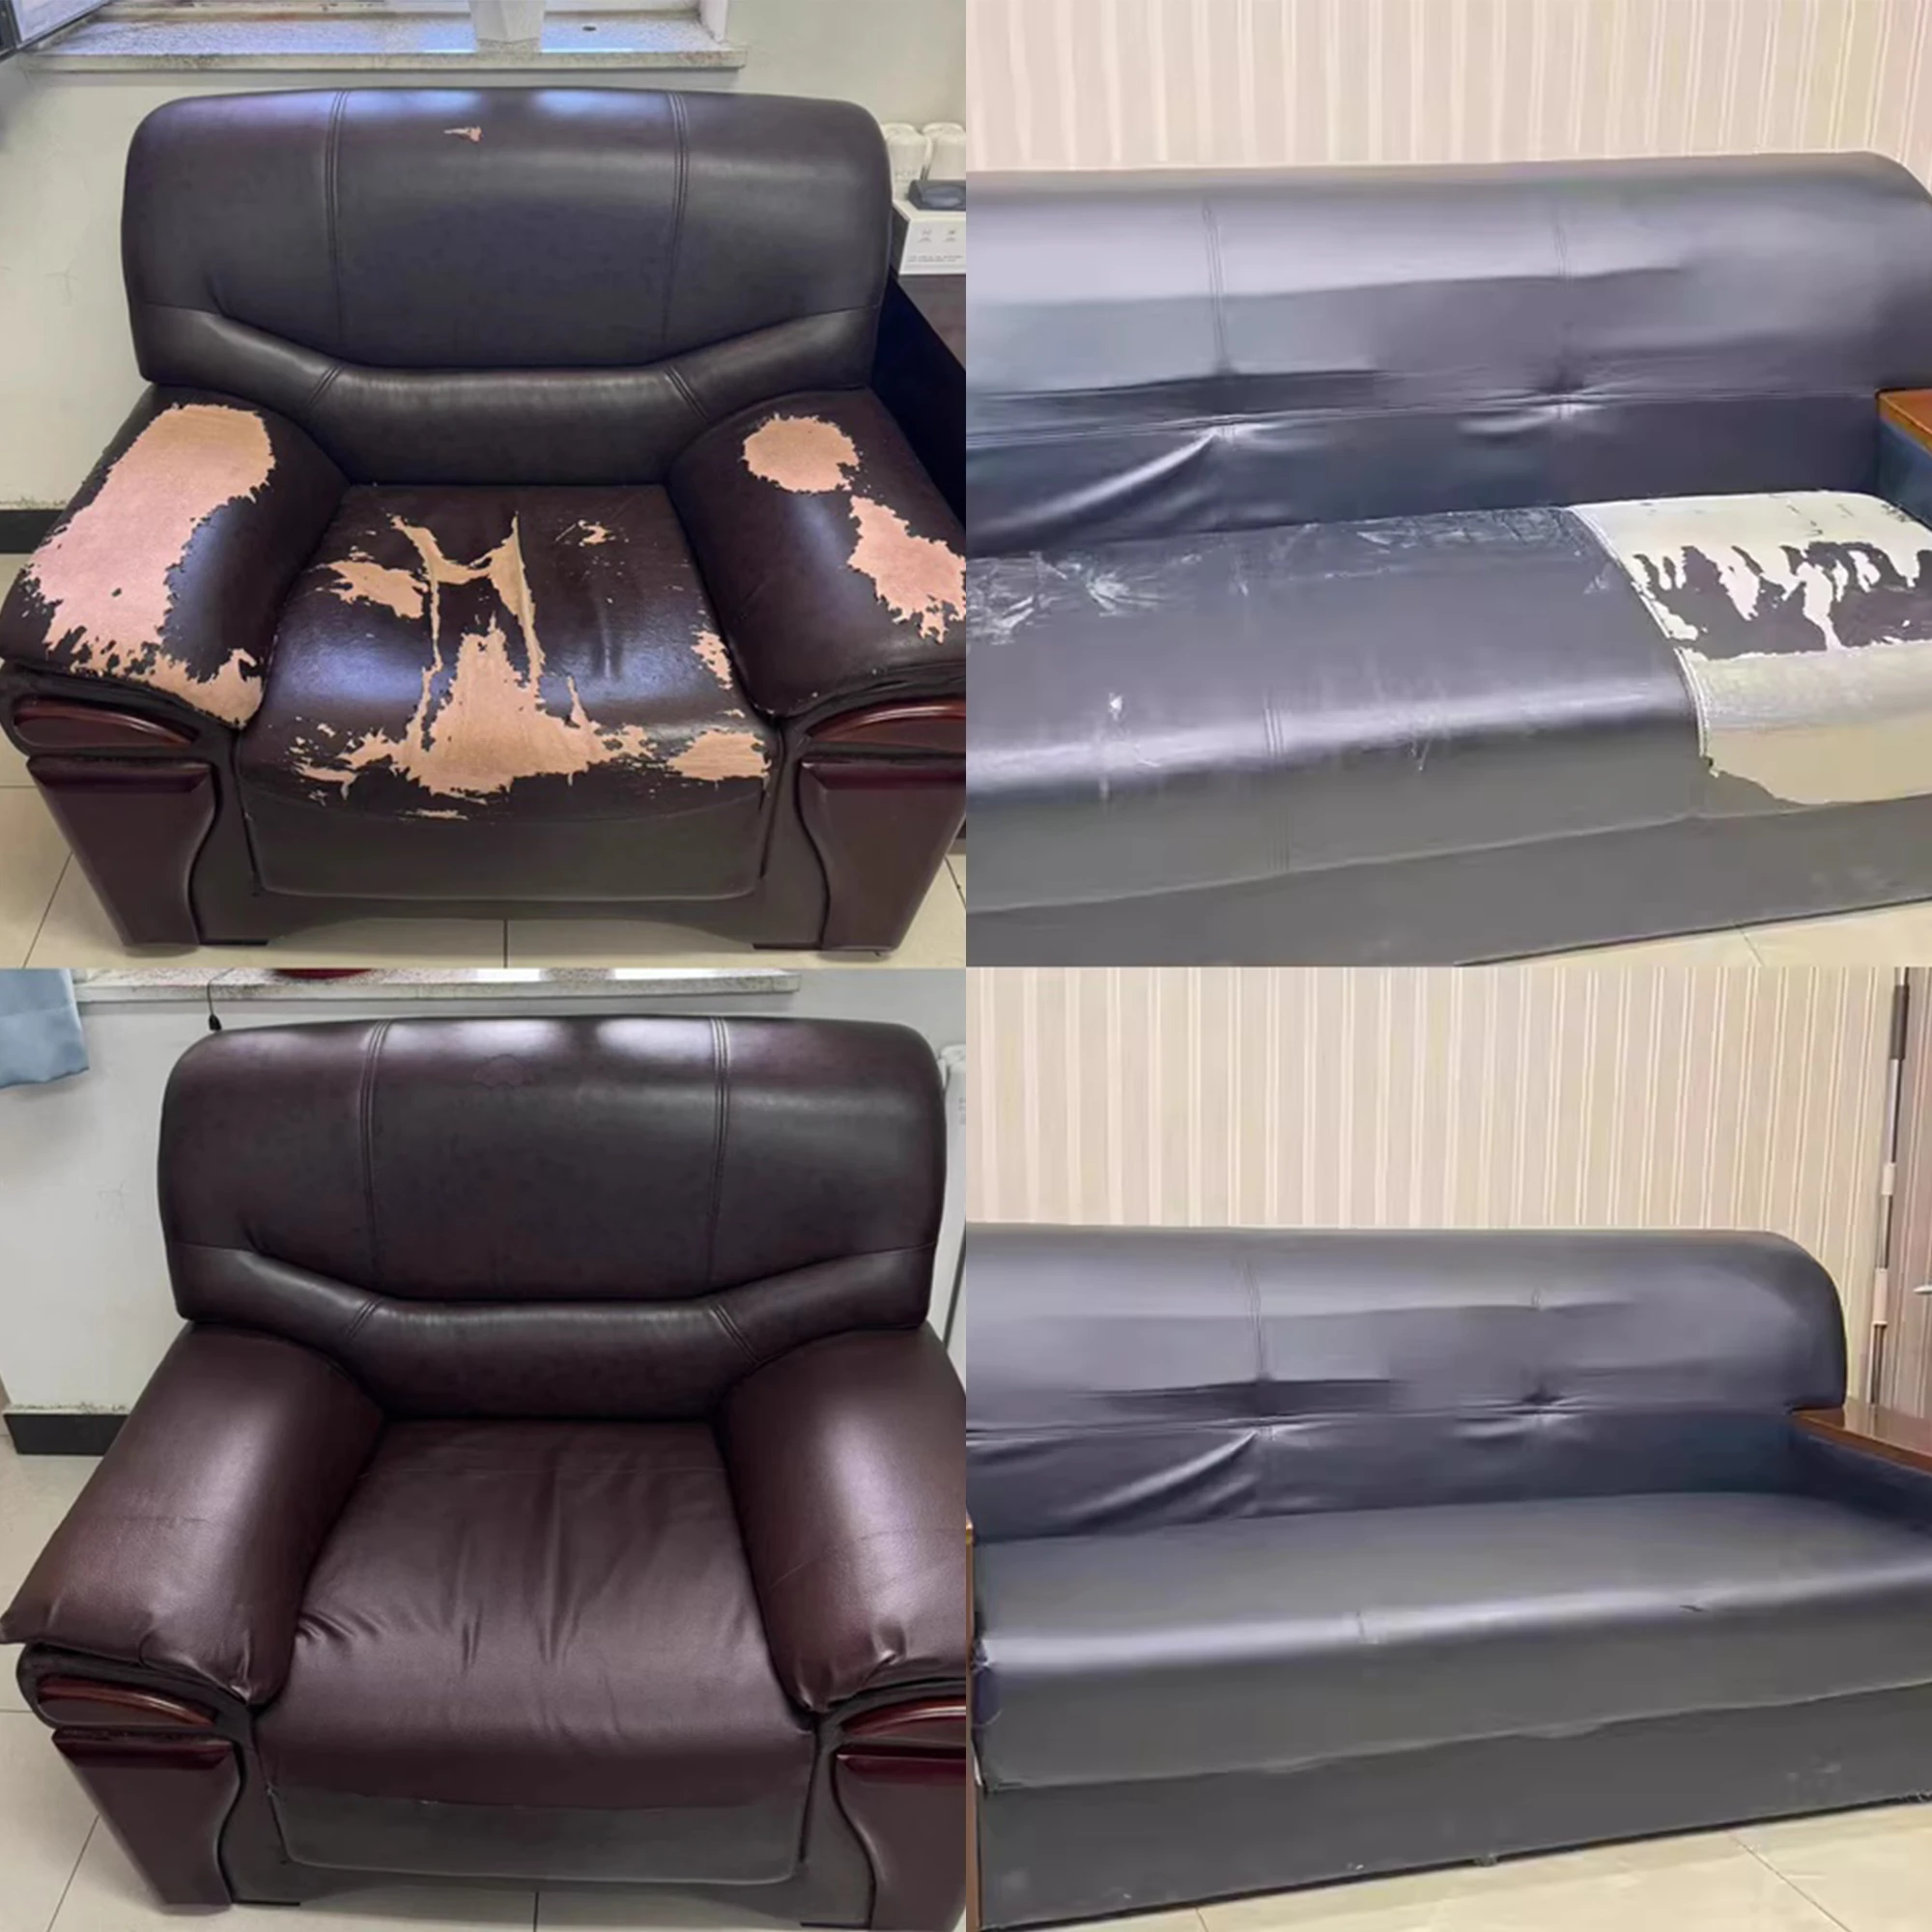
- Why Thick Layers Fail: Heavy applications just sit on top of the surface instead of bonding with the fibers. Thick coats lack flexibility. When the material naturally bends as someone sits down, a thick, rigid layer will instantly crack. Over-application is one of the most common reasons people eventually have to repair peeling leather couches all over again.
- The Layering Strategy: Proper leather dye adhesion techniques require patience. Apply a light, extremely thin coat, let it dry, and then apply another. Building the finish up through multiple thin layers ensures a flexible, highly durable bond that moves organically with the hide. This is the true secret to long-lasting leather color.
Ensuring Proper Curing Times
One of the biggest mistakes you can make during a leather finish coat application is confusing \”dry\” with \”cured.\”
- Dry to the Touch: The surface might feel completely dry to your fingers within 10 to 15 minutes. However, the chemical binders beneath the surface are still active and vulnerable.
- Fully Cured: This means the color is permanently locked into the material. For optimal leather colorfastness, a proper leather topcoat curing time usually takes 24 to 48 hours depending on your room\’s humidity and temperature.
- Using Heat Safely: I often use a hairdryer on a low, warm setting to safely speed up the drying phase between those thin layers. Keep the dryer constantly moving so you do not scorch the hide. However, never rush the final cure time before adding your color lock leather sealer. Give the chemistry the time it needs to cross-link properly.
The Secret to Longevity: Sealing Topcoats and UV Resistance
Applying the dye is only half the battle. If you want a repair that actually lasts, you need a high-quality leather sealing topcoat. Without it, your new color will eventually rub off onto your clothes or fade away in the sun. A dedicated finisher acts as a clear shield, locking the pigment into the leather fibers and providing essential UV resistance leather repair.
Choosing the Right Leather Sealing Topcoat
Selecting the correct finish is critical for making your repair blend in seamlessly with the rest of the piece.
- Matte, Satin, or Gloss: Look closely at your leather. Most modern automotive interiors and furniture use a matte or satin finish. Gloss is highly reflective and usually reserved for specific vintage styles. Matching the sheen ensures the repaired area doesn\’t stick out.
- Polyurethane vs. Acrylic: I always recommend polyurethane-based sealers over standard acrylics. Polyurethane remains highly flexible, meaning it stretches with the leather as you sit on it, preventing cracking. It acts as an unbeatable color lock leather sealer.
Preventing UV Damage and Pigment Migration
If you are dealing with sun damage leather repair, applying a topcoat with built-in UV inhibitors is non-negotiable.
- Fading Prevention: UV-resistant additives act like sunscreen for your leather, reflecting harmful rays that break down dye molecules. This is especially vital for a fading prevention leather sofa placed near a window or car seats exposed to daily sunlight.
- Stopping Transfer: Leather pigment migration happens when body heat and friction cause unsecured dye to lift. A durable topcoat creates a physical barrier to stop leather color bleeding and completely prevent leather color transfer onto your light-colored clothing.
How to Apply a Leather Finisher Like a Pro
Your leather finish coat application determines the final look and feel of the repair. A sloppy application can leave streaks that ruin an otherwise perfect dye job. When looking at pro tips for DIY car seat leather repair, mastering the topcoat application is usually the most heavily emphasized step.
- Sponge Application: If using a high-density sponge, do not wipe or drag the product across the surface. Instead, dab it lightly and evenly. Wiping pushes the topcoat around and leaves visible streaks.
- Spray Application: Using an airbrush or a dedicated spray can yields the most professional, streak-free results. Apply in light, sweeping motions, allowing each layer to dry slightly before adding the next.
- Respect Curing Times: Do not rush the leather topcoat curing time. While it may feel dry to the touch within an hour, it often takes 24 to 48 hours for the topcoat to fully cross-link and cure. Sitting on the leather before it is completely cured will compromise the finish and cause early peeling.
Long-Term Maintenance to Preserve Colorfastness
Securing a long-lasting leather color doesn\’t end once the dye dries. To truly master the guide to improving leather colorfastness in home repairs, you need a solid maintenance routine. Proper aftercare ensures your newly applied finish stays locked in place without peeling or transferring onto your clothes.
Routine Conditioning for Hydration
Keeping your leather hydrated is the most effective way to prevent the color layer from cracking. When leather dries out, the fibers shrink and pull at the surface finish, causing micro-tears where the dye eventually flakes off. I always advise applying a high-quality leather conditioner every three to six months to maintain flexibility. If you happen to spot early signs of dryness or structural damage during your routine care, understanding the proper techniques for how to repair cracked leather will help you stabilize the surface before the colorfastness is compromised.
What to Avoid
Even the best leather sealing topcoat can be destroyed by improper daily habits. To stop leather color bleeding and guarantee effective fading prevention, keep these hazards away from your treated items:
- Harsh Household Cleaners: Products containing bleach, ammonia, or heavy solvents will instantly strip your protective topcoat and trigger leather pigment migration. Always use pH-neutral leather cleaners.
- Direct Sunlight Placement: UV damage is the primary cause of color loss. Position your leather sofas and chairs away from direct windows to maintain their UV resistance and prevent severe sun fading.
- Abrasive Sponges: Never use scouring pads or stiff brushes for cleaning. These will physically scratch off the finish coat, destroying your repair work in seconds.
Why Choose Mitcer for Your Home Leather Repairs
When you invest time into restoring your furniture or car interior, you want results that last. I built Mitcer to bridge the gap between expensive professional services and cheap, ineffective DIY kits. Understanding the crucial difference between branded vs generic professional leather repair products is the first step toward achieving permanent leather colorfastness.
Our product line is specifically engineered to stop leather color bleeding, prevent pigment migration, and ensure your restoration stands up to daily wear and tear.
The Mitcer Advantage for DIY Restorations
| Product Category | Key Benefits for Home Repairs |
|---|---|
| Professional Prep Solutions | Deep cleans and removes factory finishes. Essential for maximum dye adhesion and preventing the new color from peeling. |
| High-Pigment Dyes | Delivers rich, opaque coverage in thin layers. Designed for robust color lock and long-lasting leather color without cracking. |
| UV-Resistant Sealing Topcoats | Acts as a shield against sun damage and friction. Ensures fading prevention and stops color transfer onto clothing. |
We provide DIYers with the exact same commercial-grade formulas used by the pros. From our heavy-duty leather prep and deglazer to our advanced UV resistance leather repair finishers, Mitcer equips you with everything required for a flawless, permanent restoration. By choosing the right formulations, you lock in the color, protect the material, and extend the life of your leather goods for years to come.