Are you tired of seeing your vehicle\’s premium interior ruined by cracks, scuffs, or tears?
You might think a flawless fix requires spending thousands of dollars at a professional upholstery shop.
But what if you could achieve a showroom finish right in your own garage?
In this post, I\’m sharing exclusive Pro Tips for DIY Car Seat Leather Repair.
I’ll show you exactly how to bypass the expensive fees and use industry-secret methods to restore your seats. From deep cleaning to perfectly matching colors using professional-grade Mitcer leather repair kits, you\’ll get the exact step-by-step blueprint that expert detailers use.
If you\’re ready to revive your interior and master automotive upholstery repair at home, this guide is for you.
Let\’s dive right in.
Assessing the Damage: What Can You Actually Fix?
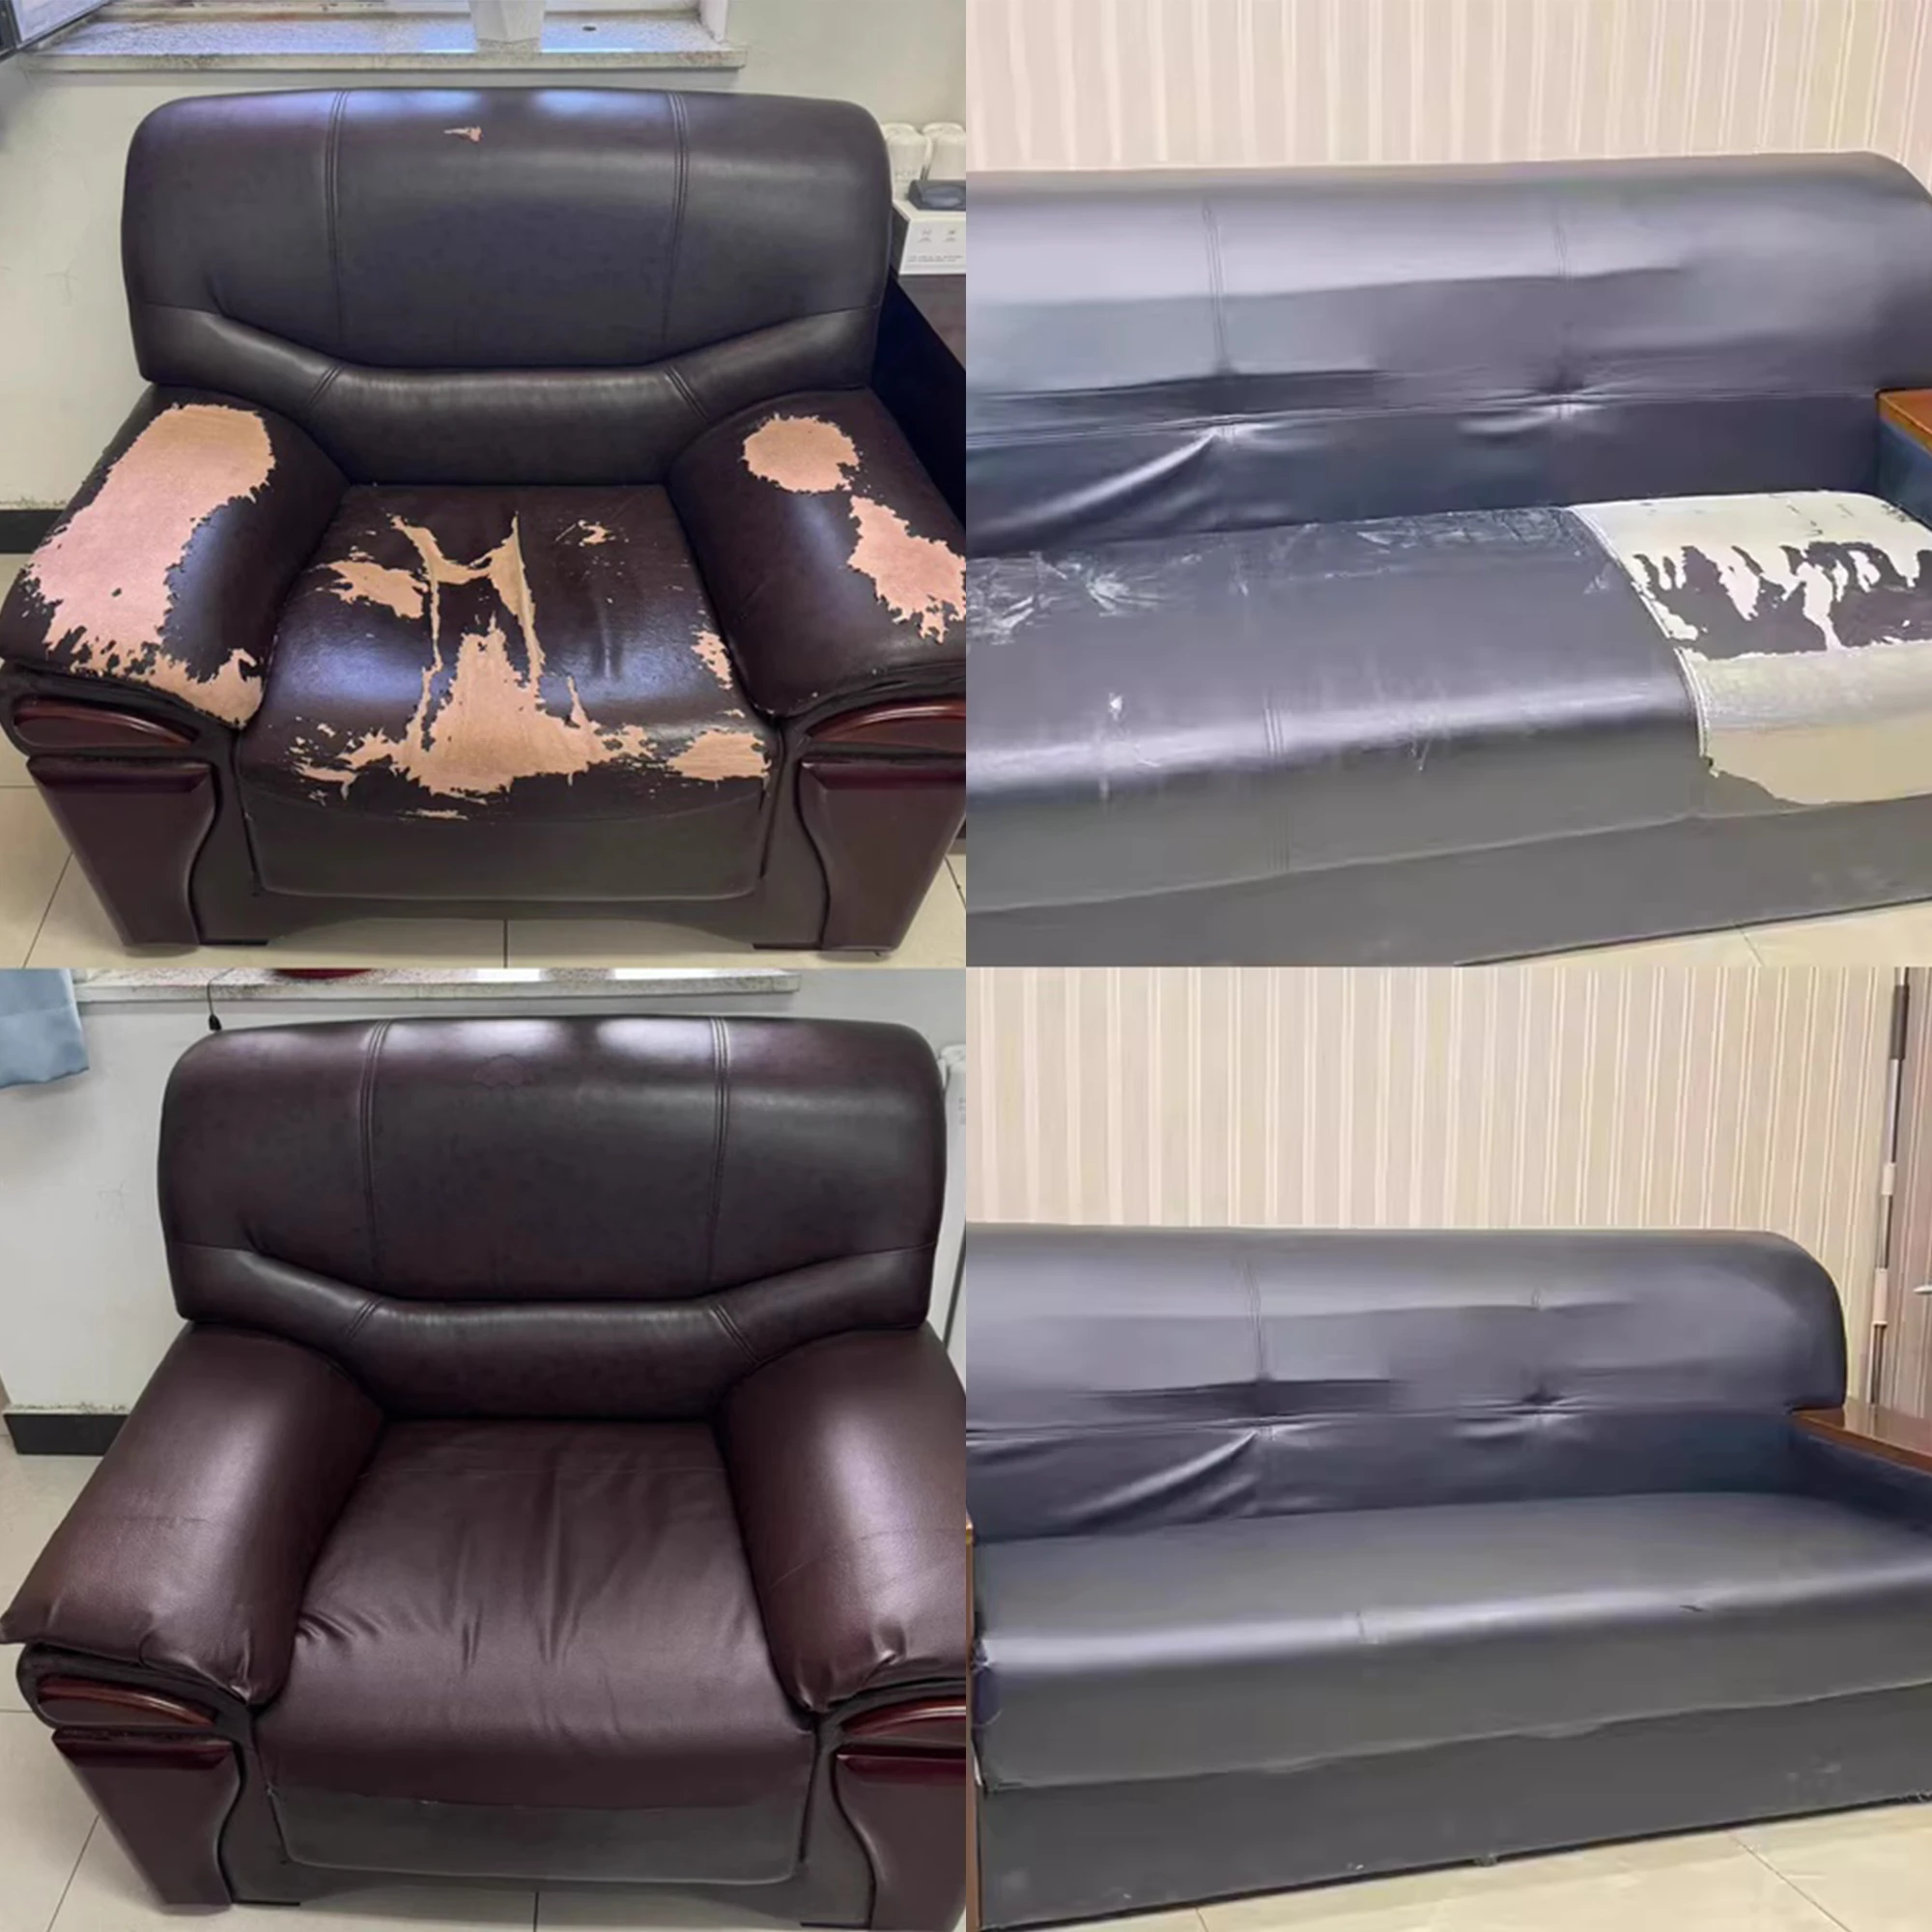
Looking at a damaged car seat can be stressful. I constantly hear from drivers who think a single tear means they need a complete, expensive seat replacement. The truth? With the right pro tips for DIY car seat leather repair, most common interior damage is completely fixable right in your own garage.
Before diving into a DIY auto interior repair, I always evaluate the severity of the damage. Here is exactly what you can fix and what it takes:
- Surface Scratches & Scuffs: This is minor top-coat damage. The structural integrity of the seat is fine. You just need a color-matched touch-up kit to seamlessly blend the affected area back into the surrounding automotive upholstery.
- Deep Cracks & Wear: When the material starts to split, you are looking at structural degradation. This requires applying a dedicated leather crack filler to level the surface, followed by proper conditioning.
- Tears, Holes, and Punctures: This severe damage requires serious reinforcement. To fix a torn leather car seat permanently, you must use canvas sub-patches, heavy-duty filler, and ensure excellent heat resistance so the repair does not melt or fail in a hot summer cabin.
Vinyl vs. Leather: Know Your Material
Before ordering supplies, you must identify your exact material. This single step makes or breaks your repair because it dictates whether you need a dedicated vinyl repair compound or a traditional leather dye.
- The Water Test: Place a single drop of water on the seat. Real leather slowly absorbs it, leaving a dark spot. Synthetic vinyl completely repels the water, making it bead up instantly.
- The Backing Check: If you can see inside a tear, look at the underside. Vinyl typically features a white, woven fabric backing, whereas genuine leather has a rough, suede-like underside.
Identifying your material correctly is the absolute first step in a successful car seat leather repair or restoration project.
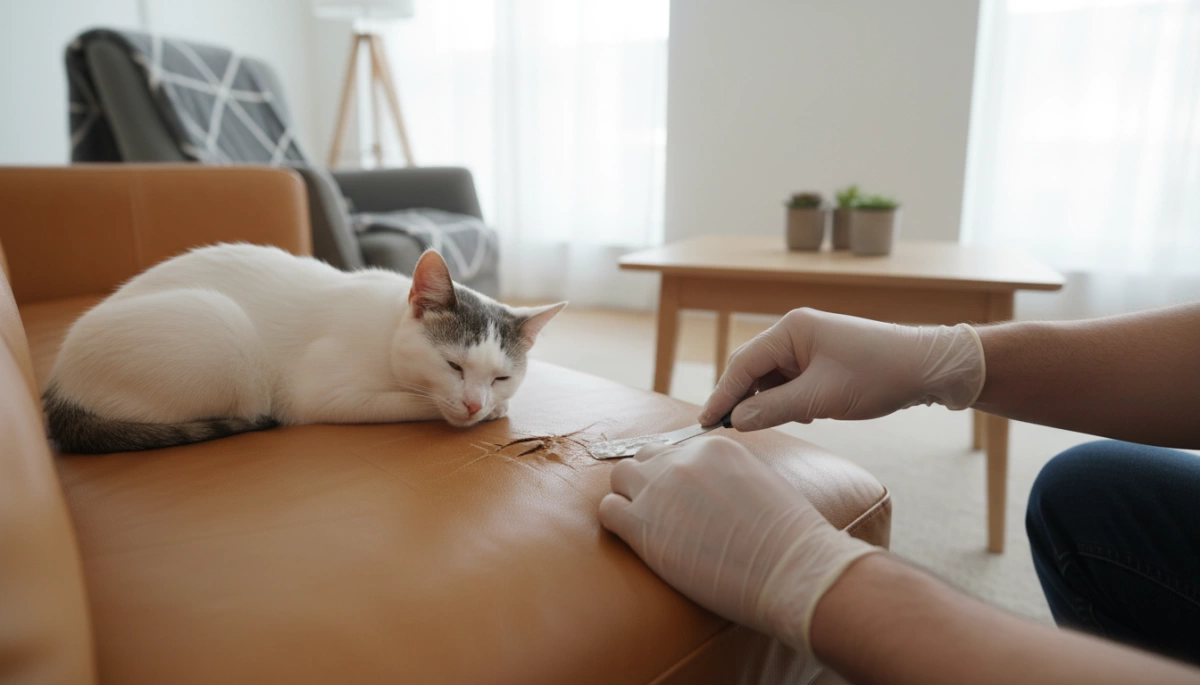
The Crucial First Step: Preparation and Cleaning
When doing DIY auto interior repair, the most common mistake I see is rushing straight to the filler or dye. If the surface isn\’t prepped correctly, your car seat leather repair will peel off within weeks. Proper preparation sets the foundation for a durable, long-lasting fix.
Pro Tip 1: Clean Beyond the Surface
You need to clean much deeper than a quick wipe-down. Automotive upholstery absorbs years of body oils, sweat, dirt, and silicone dressings from car wash detailing sprays. These contaminants create a barrier that stops leather repair compounds and dyes from bonding to the material.
- Degrease thoroughly: Use a dedicated leather degreaser and prep solution.
- Remove old dressings: Scrub away all shiny, silicone-based conditioners.
- Dry completely: Let the seat dry fully before applying any repair materials.
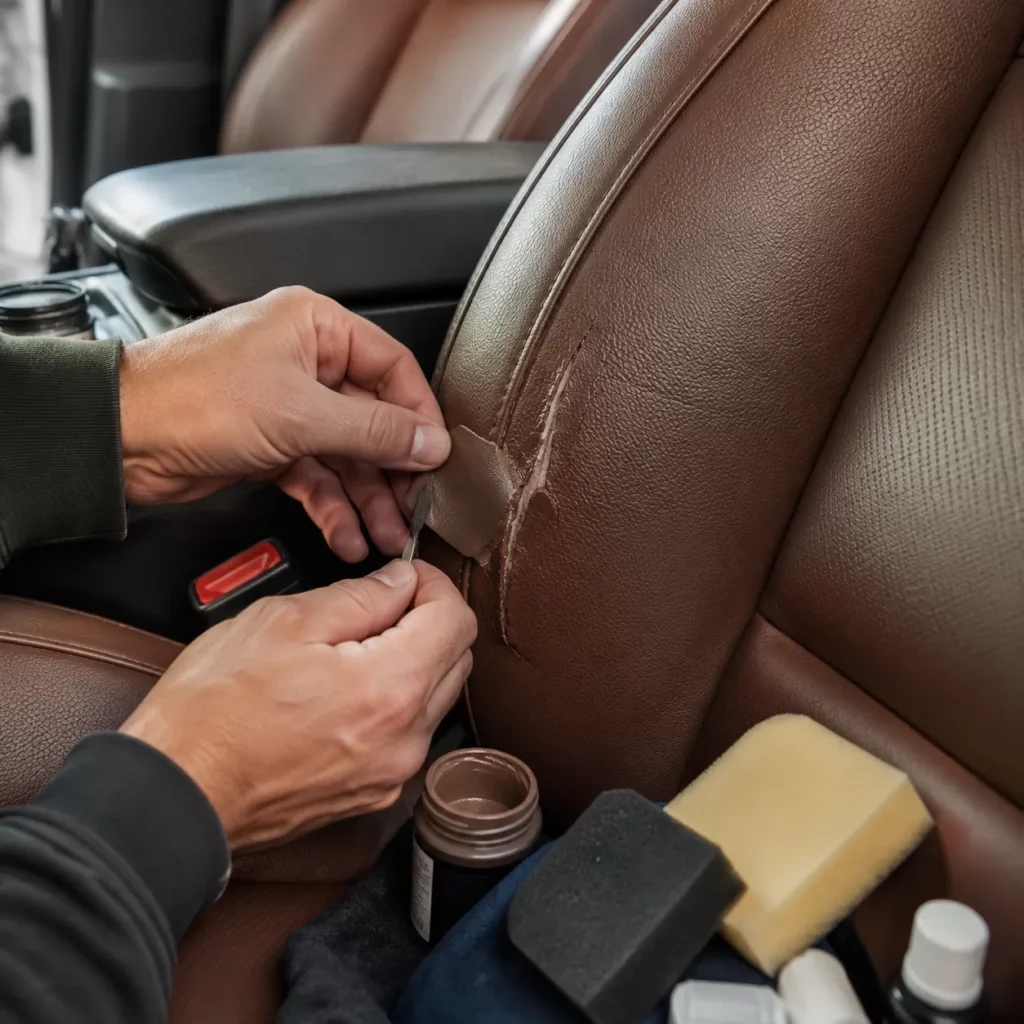
Pro Tip 2: Prepping the Edges
Whether you are dealing with a massive tear or just learning how to repair a scratch in leather, the edges of the damage must be perfectly smooth. Frayed fibers and curled edges ruin the seamless blend you are aiming for.
- Snip away loose threads: Use sharp detailing scissors to cut off any frayed backing fibers.
- Flatten curled edges: Gently trim away hardened or upturned leather around the hole so the filler can sit flush with the surrounding surface.
Recommended Mitcer Prep Products
To guarantee a strong bond, I always recommend using a dedicated leather prep fluid from our Mitcer leather repair kits. Standard household cleaners or rubbing alcohol can sometimes dry out the leather too aggressively or leave unwanted residue. A professional-grade prep fluid strips away the stubborn oils and old factory topcoats just enough to open up the pores, ensuring your repair materials lock in permanently.
Pro Tips for Fixing Cracks and Scratches
Successfully pulling off a DIY auto interior repair means mastering the art of filling and smoothing. Here is how to handle surface damage and deep creases without making the seat look worse.
- Pro Tip 3: Layer Leather Filler Patiently. When tackling a car seat leather crack repair, the most common mistake is applying one thick blob of filler to save time. Thick chunks of compound do not cure properly, remain spongy inside, and will quickly pop out under the weight of a passenger. Instead, apply multiple paper-thin layers of leather crack filler. Let each layer dry entirely before spreading the next. This method builds a flexible, durable structure that stretches naturally with the automotive upholstery.
- Pro Tip 4: Sand for a Seamless Blend. Once your filler is fully cured, leveling the surface is non-negotiable for a professional finish. Lightly sand the patched spot using high-grit sandpaper (600 to 800 grit). Your objective is to feather the edges of the repair so it transitions invisibly into the surrounding material. Keep a light hand—aggressive sanding will quickly chew through the healthy topcoat around your repair zone and create more work. A perfectly smooth base is essential before you apply any colorants or liquid leather repair compound.
Pro Tips for Repairing Tears and Holes
When dealing with severe damage, surface fixes just won\’t cut it. To successfully fix a torn leather car seat, you need structural reinforcement and materials built for extremes.
Pro Tip 5: Master the Sub-Patch Technique
You can\’t just pour filler into a gaping hole and expect it to hold your body weight. You need a solid foundation.
- Cut the Canvas: Trim a piece of canvas backing fabric so it is slightly larger than the tear itself.
- Insert and Flatten: Use tweezers to slip the fabric behind the hole, flattening it out smoothly against the foam.
- Glue it Down: Apply a flexible leather adhesive to bond the underside of the original leather directly to the canvas.
This sub-patch leather repair method provides crucial structural integrity. It is the absolute best way to permanently repair a ripped leather car seat so the damage doesn\’t split wide open the next time you get in the car.
Pro Tip 6: Prioritize Heat Resistance
Car interiors turn into ovens during the summer. If you use a standard household filler, it will melt, blister, or crack under the intense UV rays and trapping cabin heat.
- Use Automotive-Grade Fillers: Always choose a specialized liquid leather repair compound formulated specifically for automotive upholstery.
- Built to Flex: These specific compounds feature high heat resistance, allowing the repaired area to expand and contract with extreme temperature fluctuations.
Ignoring heat resistance is a fast track to doing the same job twice. Using the right compound ensures your DIY auto interior repair survives the harshest summer days and the friction of daily driving.
Mastering Color Matching and Dye Application
Getting the physical repair right is only half the job. If the color is off, the patched area will stick out. Here are my top pro tips for DIY car seat leather repair when it comes to getting that flawless, factory-fresh color.
Pro Tip 7: Custom Color Blending
Automotive upholstery fades over time due to intense UV exposure. A standard touch-up kit straight out of the bottle rarely provides a perfect match for older, sun-faded seats.
- Mix in stages: Always start with your closest base color and slowly add tiny drops of tint (white to lighten, or dark brown/black to darken).
- Do a dry test: Dab a small amount of your mixed dye on a hidden section of the seat and hit it with a hair dryer. Dye almost always dries a different shade than it looks when wet.
- Address the whole seat: Once your repair matches, you can maintain the overall look of the aged automotive upholstery by learning how to keep color vibrant with a leather color restorer to ensure a uniform, vibrant finish across the entire interior.
Pro Tip 8: Application Techniques for Natural Texture
You want your repair to look like natural hide, not a flat piece of painted plastic. How you apply your leather color matching dye completely determines the final texture.
- The Sponging Technique: Throw away the paintbrush. Instead, use a dense makeup sponge or specialized applicator. Lightly dab (stipple) the dye over the repaired area. This dabbing motion builds up micro-texture that perfectly mimics natural leather grain.
- The Spraying Technique: If you are using an airbrush or spray can for larger sections, apply three to four ultra-thin coats rather than one heavy layer. Heavy coats will flood the natural grain and leave a glossy, cheap look.
- Feather the edges: Always blend the dye slightly past the immediate repair zone. Fading the new color into the surrounding original leather creates an invisible transition.
Sealing and Protecting Your DIY Car Seat Leather Repair
You’ve done the hard work of filling the damage and matching the color. Now, you need to lock it all in. Skipping the final sealing stage guarantees your automotive upholstery repair will quickly rub off on your clothes.
Pro Tip 9: Lock It Down With a Clear Coat
Applying a dedicated clear top coat is non-negotiable. It seals in the dye and acts as a barrier against the daily friction of sliding in and out of your car.
- Match Your Factory Finish: Automotive leather isn\’t one-size-fits-all. Choose a matte, satin, or gloss clear coat that seamlessly matches the surrounding area. Most modern car interiors require a satin or matte finish to avoid looking greasy.
- Apply in Thin Layers: Sponge the clear coat on lightly. Heavy, thick coats will dry cloudy or crack under pressure. Taking your time here ensures a durable, professional-looking car leather seat repair.
Pro Tip 10: Respect the Post-Repair Curing Time
Patience is the final ingredient for a lasting leather car seat restoration. Just because the surface feels dry to the touch does not mean it is ready to handle your body weight.
- The 48-Hour Rule: Give your seat a minimum of 48 hours to fully cure before sitting in it. The liquid leather repair compound and top coats need this time to cross-link and build maximum heat resistance.
- Avoid Extreme Conditions: While curing, keep the freshly repaired seat out of direct, baking sunlight and avoid freezing temperatures to ensure the compounds bond correctly to the underlying leather.
Common DIY Mistakes to Avoid in Automotive Upholstery Repair
Even with the right tools, DIY auto interior repair can quickly go off track if you miss a few critical details. Over the years, I have seen many ruined seats that could have been easily saved. Here are the biggest traps you need to avoid when doing your own car seat leather repair:
- Skipping the degreasing stage: Applying filler or dye over accumulated body oils, dirt, or old silicone dressings guarantees peeling. The repair materials simply will not bond. Always prep the surface thoroughly before starting.
- Using standard household glues: Super glue and basic craft adhesives dry hard and brittle. The moment you sit down, the repaired area will crack under the pressure. You absolutely need flexible adhesives designed for automotive seats. To understand what makes a durable bond, you can read our findings on testing leather repair glue for superior adhesion.
- Over-applying the colorant: Piling on thick layers of dye or paint is a surefire way to ruin the natural texture of the material. Heavy coats leave the seat feeling stiff, sticky, and completely plastic-like. Always build your color slowly using multiple, very thin layers.

